Direct sowing - guidelines for direct sowing in the bed
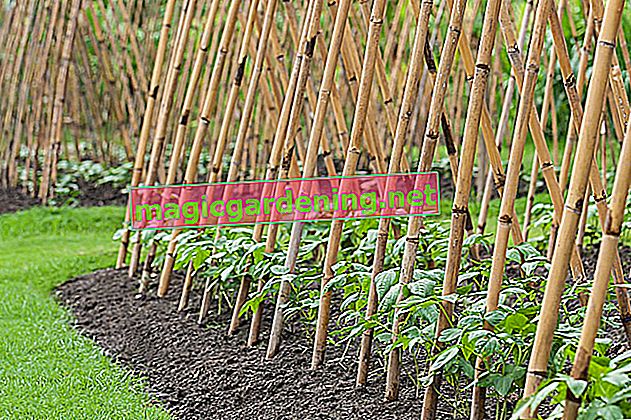
In April and May there is a lot going on in the flowerbeds and vegetable gardens. After the ice saints at the latest, the time window opens up for the direct sowing of native species such as sunflowers, snapdragons, carrots, runner beans or radishes. If you want to create a lawn, this time of year also selects for sowing lawn seeds. How to proceed correctly step by step:
- Work the soil with a rake and rake until a weed-free, loose, finely crumbly structure is created
- Depending on the type of plant, sow the seeds broadly or in rows
- Row sowing: make a furrow, insert seeds at the prescribed distance and cover with soil
- Press the seeds on with your hands or a lawn roller and water with a fine shower head
also read
- Sowing the catnip - step by step
- Growing Amaryllis From Seed - A Step-by-Step Guide
- Sowing the summer aster: step by step
To protect against pecking birds and hungry snails, cover the seedbed with a protective net. At the end of the day, please do not fail to mark the rows of seeds with the seed labels.
Growing on the windowsill - this is how you prepare the seeds
Numerous garden plants come from distant countries, such as popular petunias and tomatoes. Higher temperatures are required for germination, so home gardeners sow the seeds on the windowsill or in the greenhouse. Pay close attention to these preparatory tasks:
- Provide nutrient-poor, germ-free sowing substrate
- Clean the seed pots and check for drainage openings in the soil
- Fill the spray bottle with room temperature, stale water
- Have transparent hoods or plastic bags ready
- Soak seeds for 24 to 48 hours in lukewarm water or chamomile tea (thermos)
Environmentally responsible home gardeners do not use peat-based tools. Coconut fiber substrate, for example, is ideal for sowing. Sowing in peat pots is also frowned upon, because reusable seed trays, pots or discarded egg cartons are perfect growing containers.
Sowing instructions - the way from seed to seedling
While the seeds are soaking, fill each seed pot two-thirds full with substrate. Press the earth down and spray the surface with water. You can now sow the still moist seeds on the moistened soil. Press the light germinator with a wooden board for a good ground connection. Sieve dark germs with substrate at a species-specific level. You can find out what type of seed it is on the seed label. So it goes on:
- Cover the seed pots with a transparent hood or plastic bag
- Set up at the partially shaded window seat at temperatures of 20 to 25 degrees Celsius
- Ventilate cover daily
- Sprinkle with water as soon as the soil dries up
- Do not fertilize seeds and seedlings
The germination time depends on the type of plant. Some growth rockets germinate after a few days, while other seeds take weeks or even months to germinate. When the first germinal lamellae sprout, the hood has fulfilled its duty and is removed. Keep the substrate slightly moist and do not apply fertilizer.
Prick out and harden seedlings - this is how it works
The first real leaves grow after the cotyledons. Both leaf types can be easily distinguished visually. In the course of further growth, the seed pot becomes crowded. It is high time to give the busy seedlings more space. For this purpose, repot the strongest specimens in their own pots. This process is known as pricking. Thats how it works:
- Small plastic pots fill with special piquing earth
- Drill a small planting hole in the middle with a pricking stick or spoon
- Lift the seedlings out of the seed pot one at a time and with a great deal of tact
- Plant in the pricking soil, press down and water
From mid-April, place your pupils in a warm, partially shaded spot on the balcony or in the garden during the day. The young plants spend the cold nights behind glass until mid-May. This hardening phase guarantees robust plants and vital growth in the bed right from the start.
A little seeding ABC - this is how you avoid pitfalls
We have summarized the most common beginner mistakes so that everything runs smoothly when you first sow. Practical tips point out how to avoid the pitfalls:
- Dried out soil: keep the substrate slightly moist with soft, warm water
- Too much or too little soil on the seed: do not cover the light germinator, sieve the dark germinator over at least as thick as a seed
- Cold draft: do not set up the seed pots near tilted windows
- Aging shoots due to lack of light: if the shoots are long, thin, illuminate the seedlings with plant lamps
The most common and most fatal care mistake is waterlogging in the seed pot. The advice on regular watering and spraying should not lead to seedlings standing in the water. The result is fungal infections such as the dreaded fall-over disease. Drainage holes in the bottom of the pot and a balanced water supply are the best prevention.
Tips
With your own cold frame, the starting signal for sowing is given in February and March. Equipped with natural heating, the first seeds germinate here if there is still snow in the garden. You can easily build the ingenious box yourself or purchase it as a finished kit from retailers.