Advantages of a stone raised bed
Plants often thrive in the vicinity of stones. There are various reasons for this: stones store the warmth of the day in order to release it back into their surroundings at night. They shade and protect their resting place, so that the plant roots are protected from drying out by an overly bright sun. Depending on their size, stones take up more or less space and accordingly also keep the ground free from excessive vegetation. This gives the plants in their immediate vicinity all the more light. Dew that has formed on the stones seeps into the ground and therefore also benefits the plants growing here.
also read
- How to build a raised bed out of stone
- Building instructions - This is how you can easily build your DIY raised bed yourself
- So you can build a round raised bed yourself
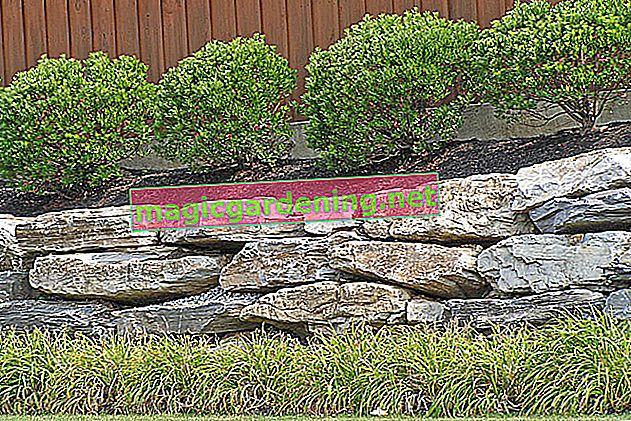
Which stones are used to build the wall?
The raised bed gardener is spoiled for choice and can choose from a wide range: natural rubble stones, bricks, clinker, paving stones and many other types of stone are possible for a brick raised bed project. Rectangular, round, oval or even like a snake: there is a suitable stone for any shape. If the bed is to be bricked up using mortar, evenly shaped stones are preferable to irregularly shaped ones. These can be processed more easily into a vertical raised bed wall. Naturally formed rubble stones from a quarry, on the other hand, are more suitable for the “dry” variant of the raised bed, in which the stones are loosely layered on top of one another in dry construction - i.e. without the use of mortar. Dry stone walls should always have a slight incline to reduce the earth pressure,which acts on them to be able to intercept more easily.
Bricks should be frost-proof
In principle, you can work with any stone intended for walls. However, make sure that these are insensitive to both cold and moisture. Moisture penetrating the masonry can namely. caused by frosts in the cold season, lead to serious damage and thus reduce the lifespan of the raised bed. For this reason, bricks, for example, are less suitable for building a raised bed. Clinker, on the other hand, is both robust and aesthetically pleasing, but difficult to process.
Building a raised bed - step-by-step instructions
Once the most important questions about the right material have been answered, you can finally start building your stone raised bed.
You will need these materials:
- Gravel for the foundation (indispensable for brick raised beds!)
- Bricks
- a suitable mortar (ready-made mixture from the hardware store)
- Pond liner to cover the interior walls
- a floor grille to protect against vermin (e.g. rabbit wire)
- organic filling material (e.g. compostable garden waste, potting soil)
When it comes to tools, you should definitely have a spirit level, a vibrating plate, (€ 214.60 on Amazon *) a plumb line, a spade and suitable masonry tools ready.
And let's go:
- Dig a foundation trench at least 8 inches deep.
- Carefully compact this with a vibrating plate.
- Fill in gravel and carefully compact each layer here too.
- Now put the first row of stones in a thick bed.
- Align them precisely.
- Now wall up the raised bed row by row.
- Lay the rabbit wire out completely on the floor.
- Cover the inside with pond liner or another suitable material.
- This is used for moisture protection and thus for a longer shelf life.
- Now you can fill and plant the raised bed as desired.
Tips
Raised compost beds should be created in autumn if possible, so that the material will rot by then and the nutrients it contains are available for the plants.