Origin and Distribution
The nest fern (bot. Asplenium nidus) is a species of fern from the striped fern family (bot. Aspleniaceae) that was widespread in prehistoric times. The houseplant and tub plant, which is popular with us due to its simplicity and its stately, green tuft of leaves, comes from the tropical regions of Asia, Australia and Africa, where it grows and partly as a epiphyte on trees (bot. Epiphyte) or rocks (bot. Lithophyte) very common. The nest fern is one of the most important habitats of many arboreal frog species, as the amphibians find the necessary moist and cool microclimate in the frond funnels.
also read
- How to care for your nest fern - tips and tricks
- Is the nest fern poisonous?
- The wonderful world of climbing roses - history, varieties, care
Appearance and stature
The nest fern, which grows epiphytically in its natural environment, can reach considerable sizes and is often between 90 and 100 centimeters high even in indoor culture. The plant develops a dense rosette of strong green leaves, the so-called fern fronds, which grow from a strong, woody rhizome. In addition to the fronds, the rhizome also has numerous aerial roots that can form a dense tangle. Nest ferns grow upright at first, but the leaves, which become longer and longer, hang over slightly with increasing age.
leaves
The long, wavy leaves of the nest fern arise from a funnel-shaped, basal rosette and grow more or less upright. The nest-shaped leaf funnel has an important function for the nest fern, because here both rainwater and plant remains collect. These ensure that the plant is supplied with moisture and nutrients. The lanceolate leaves can be up to 120 centimeters long and up to 30 centimeters wide.
Flowers, flowering time and fruits
Like all ferns, the nest fern does not develop any flowers and is therefore a pure leaf ornament. However, Asplenium nidus itself multiplies through spores that sit in groups in elongated spore beds on the underside of the long leaves to the right and left of the midrib.
Toxicity
Nest fern is - like almost all real ferns - non-toxic. In some Asian regions, for example in the mountainous regions of Taiwan, the leaves are traditionally even prepared as a vegetable.
Which location is suitable?
From a botanical point of view, ferns - and thus also the nest fern - are among the shade plants. However, that does not mean that they can do without light entirely. At its natural location, the nest fern thrives under the protection of the tall jungle trees, but still receives sufficient sunlight for its lush growth. The plant feels most comfortable in partial or light shade, only direct sun should be avoided - this causes burns on the delicate fern fronds. A spot by a north-facing window is perfect. The plant also feels good in the bathroom due to the high humidity required. Keep the humidity high all year round at at least 60 percent, better up to 80 percent, and ensure warm temperatures between 18 and 25 degrees Celsius.The nest fern cannot tolerate drafts either.
Substrate
When it comes to the right substrate, nest fern is not quite as demanding. In principle, the plant thrives in all commercially available potting soil, provided it contains humus instead of peat and is mixed with expanded clay granulate, gravel or sand to improve permeability. Also for better drainage you should fill in a layer of expanded clay (€ 17.50 at Amazon *) or gravel on the bottom of the pot. Since the nest fern, like many tropical orchid species, is also an epiphytic species, you can also place the plant in coarse orchid soil.
Planting and repotting
Since the nest fern grows very slowly and does not develop a strong root system, you only have to move it into new soil every two to three years - exception: you water the plant with calcareous tap water, then annual repotting in fresh substrate is recommended. Like other epiphytes, the nest fern is very sensitive to lime. A larger plant pot, on the other hand, is only necessary if the fine roots are already growing out of the old container. The new pot should not be too big, one size larger than the old one is sufficient.
When planting and repotting, remove as much of the old, used substrate as possible and sterilize the new one in the oven (30 minutes at 150 degrees Celsius) or in the microwave (10 minutes at 800 watts) to protect against pests and pathogens. In addition, do without a planter and place the planter on a bowl filled with stones and water to increase the humidity.
Watering the nest fern
As a typical rainforest plant, the root ball of the nest fern should always be kept slightly moist, but never wet - the plant, which is sensitive in this regard, does not tolerate waterlogging at all. Let the substrate dry out a little in between before you water or dip again. Especially during the warm summer months, the nest fern often has a high water requirement and can therefore occasionally be dipped with its root ball in a bucket of water. Pay attention to these tips when pouring:
- If possible, only use water with little lime.
- Filtered or well-stale tap water or rainwater work well.
- Ordinary tap water can also be used.
- Then, however, must be repotted in fresh substrate every year.
- Otherwise there will be deficiency symptoms.
- Always water with room temperature, never with cold water.
In addition, make sure that you always water from below and directly onto the substrate, the delicate fern fronds should not be wetted.
spray
In the rainforest, the humidity is naturally very high. So that the nest fern also feels comfortable in your living room, you should create similar conditions there. Simple methods are suitable for this, which are particularly suitable during the winter heating season (and the associated dry room air):
- Set up a humidifier.
- Install an indoor fountain.
- You can easily build this yourself.
- Set up bowls filled with pebbles or gemstones and water.
- Place the plant pot on such a stone bowl instead of in a planter.
- This bowl should be larger than the pot so that the water can evaporate.
- However, the roots of the nest fern must never stand in water.
Many tropical houseplants should be sprayed regularly with a fine mist to keep the humidity high. However, you should refrain from doing this with the nest fern, as the sensitive leaves cannot tolerate such treatment and then develop unsightly brown spots.
Fertilize the nest fern properly
Regular fertilization of the nest fern is not necessary in the first year after repotting or if it has been repotted annually in fresh substrate. Only from the second year onwards do you supply the plant with a liquid, weakly dosed green plant fertilizer between April and September, which you should ideally administer together with the irrigation water. A dose about every two to three weeks is completely sufficient. During the second half of the year, either fertilize very lightly every six to eight weeks or not at all.
Cut the nest fern correctly
Regular pruning is neither necessary nor useful for the nest fern. So you shouldn't want to limit the size or circumference of the plant with the help of scissors, because this leaves an unevenly shaped leaf funnel. You only remove dried out fern fronds directly at the base, but you should not cut into the leaves that are still green. Once trimmed, fronds do not grow back.
Propagate nest fern
Ferns cannot be propagated vegetatively or via seeds. The only way to multiply is through the spores on the underside of the leaf. However, you need a lot of patience, because it can take up to a year for the offspring to be recognizable as a nest fern. And that's how it works:
- Reproduction is only possible with mature spores.
- You can recognize them by the fact that they dust easily.
- Cut off a spore-bearing frond.
- Wrap it in a paper bag and let it dry for a few days.
- During this time the spores loosen and can be sown.
- Well moistened sand is suitable as a substrate.
- Nest fern is a light germinator, so do not cover the spores with substrate.
- Cover the plant pot with glass or foil.
- Place it in the shade and at least 22 degrees Celsius warm.
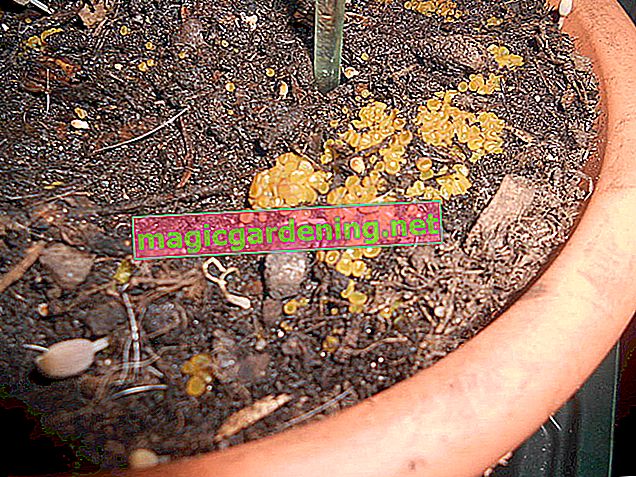
Do not throw away the substrate if the surface turns slightly green after a few months. These are not molds, but the developing young plants. However, these can only be recognized as such after a few more months. Plant them in separate pots as soon as they are about three centimeters tall.
Tips
If the nest fern feels comfortable in its location, you should not move it under any circumstances. The plant can react very sensitively to such a disturbance with drying up fronds. However, you can rotate the plant pot every few days for even growth.
Species and varieties
Most of the time, only the Asplenium nidus species is available on the market, as only a few varieties exist. These differ in height and the shape of their leaves, which are usually more or less wavy. The variety 'Crissie', for example, is particularly interesting, as it has strongly fringed leaf tips and thus looks quite peculiar.
Quite similar to the nest fern is the striped fern (bot. Asplenium antiquum), which is sometimes also referred to as the nest fern, but has thicker and more pointed leaves. This species, native to East Asia, is closely related to and looks very similar to the native hart's tongue fern (bot. Asplenium scolopendrium). This can also be cultivated as a houseplant, as can the breeding fern (bot. Asplenium bulbiferium).
 Sword fern 'Vitale' 7.84 EUR Buy at baldur Hanging plant Sword fern 15.65 EUR Buy at baldur Phlox-Mix 'Flowers of the Sea' 8.82 EUR Buy at baldur